New Flooring in the Hallway Bathroom

0 Flares 0 Flares ×

Hey Y’all!

If you read my last post, then you know that we finished the bathroom renovations this past weekend! Yippee!!! I am trying to put some finishing touches on the room before it will be ready for the big reveal! I’m aiming for sometime next week! Fingers crossed!!

If you’ve been following along with this remodel, then you know that when this project began, I only had plans to hang some beadboard wallpaper & add a chair rail to the room. Then before I knew it, we were giving the shower a makeover & replacing the bathroom floor as well! Funny how one thing leads to several more things! 🙂 I’ve already shared the shower before & after pictures with you, but I have yet to blog about our new flooring!

So, let’s talk flooring….shall we?!

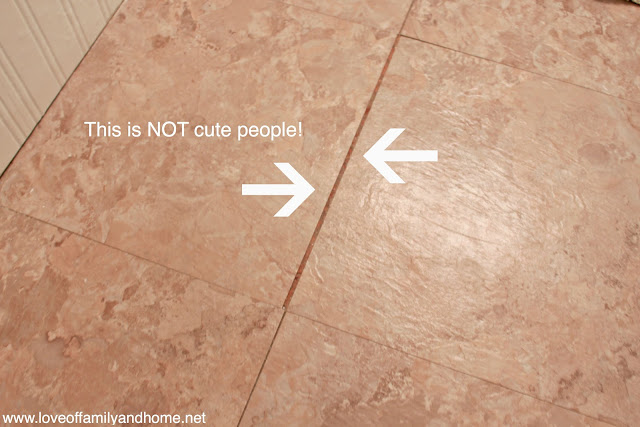
I told you in this post, that when we first bought our home 7 years ago, we had carpet in the bathroom! YUCK!! We were newlyweds & trying to renovate our new home on a budget, so we opted just to rip up the old (nasty) carpet & put down some inexpensive peel & stick tiles. They served the purpose for the time being, but over the years they began to shift & we were starting to see the subfloor peeking though….

NOT cute…..Not cute at all!

Since I had ripped up the baseboards to put up the beadboard wallpaper, we thought there wasn’t any sense in putting them back down without replacing the floor first! This task had been on our to-do list for quite sometime & it was time to just GET.IT.DONE!!! 

So, I made a trip to a few of our local home improvement stores & looked through a ton of different ceramic tile options. After much thought, I settled on the Carribean Slate ceramic tile from Lowes.
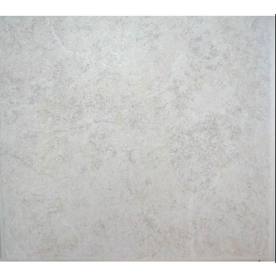
Style Selections 12-in x 12-in Caribbean Slate Ceramic Floor Tile

Item #: 16286 |  Model #: L301123

This the photo from the Lowes website. It doesn’t represent the tile very well. I know it appears very grey in this photo, but I promise it’s not that dark in person! (I will show you some pics in just a bit!) 

We wanted something neutral & fairly inexpensive. These 12×12 tiles were just 98 cents a piece. I bought 4 cases of tile (44 tiles total) & we had just a few leftover. At first, my dad thought he could lay the tile for us, but after doing a little research, we realized that we were gonna have to buy a few tools for the job, plus we would have to rent a tile cutter for the project as well. If we spent just a little more money, then we could hire someone to do the job for us. So, that is what we did! This not only saved us from having to buy tools we proably wouldn’t use again, but it also saved my dad the headache!
After purchasing the hardibacker board, tile, mortar, & grout, we had spent right at $100.00. The guy that laid the tile for us charged us $180.00, which brought the total expense for the new floor to $280.00. 
All in all, we thought that was a pretty reasonable price for this space and we couldn’t be more pleased with how the floor looks….
No more gaps between tiles….no more subfloor peeking through!! Momma is happy!! 🙂
Here is another before & after comparison to give you a little better of an idea. This time you get a little peek into the space as well!
Before….

After….
One of the main goals I had when I started this room makeover was to brighten the room! You can see from the photo above, that the new space is A LOT brighter thanks to the new beadboard wallpaper & a few coats of white paint! 🙂 
I’m still struggling to get good pictures in this space do to the fact that there aren’t any windows! The room is also long & narrow which also making shooting difficult!! Gonna try a couple different things when taking the photos for the big reveal post! Hopefully I’ll come up with a solution! Stay tuned!!
Thanks for following along with this makeover & also for being so patient!! 

I hope you all have a fabulous Thursday!!!

Don’t Miss Out – DIY projects, home decorating, crafts & more by checking out my subscribe page
Related Posts Plugin for WordPress, Blogger...

Comments

  1. Wow, Tonya, what a difference! I’m amazed that you could have a brand new tile floor for such a small amount of money–that’s awesome! You got a lot of bang for those 280 bucks!

  2. Looks great as usual. I am still waiting on my chair rail to be put up….I am losing my patience 🙂

  3. What a transformation! Great job, it’s beautiful.

  4. Cute! I am really excited to see the whole room now, it looks so much better!!!!

Trackbacks

  1. […] to a nice, sturdy, & beautiful ceramic tile from Lowes. You can read more about the flooring HERE. The little boxwood in the white pot is from IKEA, the shell on the pedestal (I think) is from […]

0 Flares Twitter 0 Facebook 0 Pin It Share 0 Google+ 0 0 Flares ×