Happy Monday Everyone! (Can Mondays be happy…I’m not sure about that?!)
Did you all have a good weekend?! We certainly did, but as always it just wasn’t LONG ENOUGH!!
I wanted to take a few minutes today & show you how I made the framed “JOY” sign for my Christmas Mantel. Are you guys up for that?!


This was an easy & inexpensive project that would look great in any area of your home this Christmas. Seriously….if you have an ounce…maybe even a half of an ounce of creativity, YOU CAN DO THIS!!
Are you ready?! Here we go!
I had the idea for this project several weeks ago. You all were such fans of the Burlap Monogram that my mom & I created last year, so I thought this project would probably go over well too! 🙂 My mom had a yard sale a few weeks back & I immediately saw this picture and thought it would work perfectly.

The frame measured 26.5″ x 16.5″.
So, I took the print & matte out of the frame.

I cleaned the glass & put it back inside the frame. Then I added the fabric.
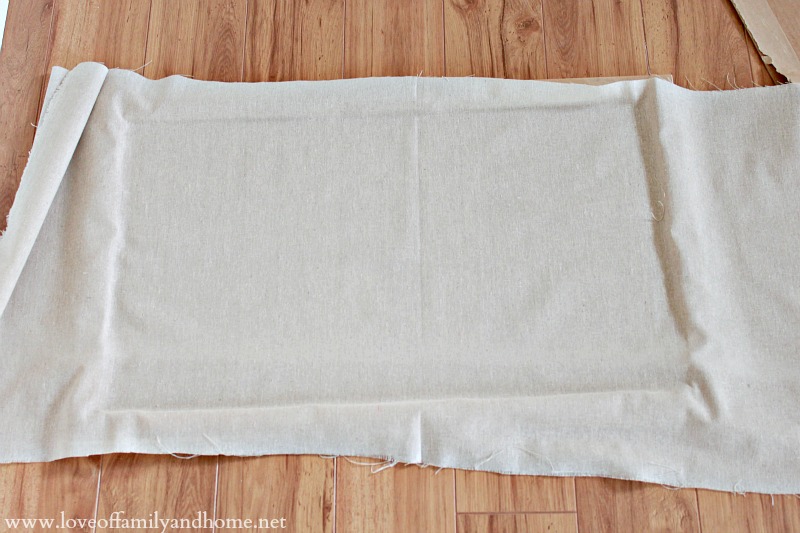
I used Osenberg fabric from JoAnn’s. This fabric can be somewhat see-thru, so I did end up adding some white cardstock behind the fabric, so that the cardboard backing wouldn’t show through on the other side.
After adding the white cardstock, I put the cardboard backing on top of the fabric & then trimmed off the excess.

As for the letters, I purchased them at Hobby Lobby. They were $2.50 a piece, but if you watch the sale ad, they do run them half off from time to time. They letters are 9.5″ tall.

I gave them a couple coats of white craft paint. I used “Titanium White” by FolkArt.

Once the letters were dry, I grabbed the “O” and decided to fancy it up a bit by adding some pearls. I bought this package at JoAnn Fabrics for $3.99. I used just the one package & still had a few pearls to spare!

To adhere the pearls to the letter, I just used hot glue. I found that the easiest way to add the pearls was to line the outside of edges first, & then fill in the middle!

This part of the project was a little time consuming, but well worth it! Just watch your fingers….I didn’t make it through this part without a few burns!

Once I was finished adding the pearls to the “O”, it was time to adhere the letters to the frame. I used hot glue for this part as well. Just load the back of the letters with hot glue & place them directly on the glass.

Overall, I liked the way it looked at this point, but thought it need just a little something extra. So, I ran out to Walmart & bought 4 greenery picks & some burlap ribbon to make a bow. Then, I hot glued the picks & the bow to the top of the frame.

It was the perfect added touch! 🙂

Don’t you agree?!
I just can’t get enough of this display! It makes me smile every time I walk past it!
I have had quite a few of you inquire about the book page trees!

I ASSURE you that a tutorial is coming up for those as well!! Stay tuned!!
Oh!! And one last thing, before I go!
I’m so excited to be teaming up with 7 other talented bloggers this week to bring you a week of Christmas Dollar Store decorating ideas!! Each day this week, 2 bloggers will be sharing ideas on how to decorate for the holidays using dollar store items, then on Friday, it will be YOUR turn to show us YOUR ideas with a LINKY PARTY!!
Here are the bloggers participating & the schedule for this week:
(Be sure to visit these talented ladies today!)
p.s. This is the last week to enter the $1,000 Christmas Cash giveaway!! If you haven’t entered yet, be sure to do so!!


Wow it looks gorgeous I love the pearls xxx
You know I’m gonna go buy some pearls now and get my hot glue gun out. 🙂
Hi Tonya! This is one of my favorite “Joy” displays I’ve seen. I love the idea of adding pearls.
I’m having a FACEBOOK social hop. I’d love for you to hop on over, grab a button and link up your facebook.
http://mydailyphotojourney.blogspot.com/2012/12/facebook-social-hop.html
Have a crazy beautiful week!
I love how you used the pearls to add shine and texture! Well done!
GORGEOUS! You had me at hello with the pearls!!