Hey Friends!!
Hope you all are having a great week thus far!
Well, after a few days, I feel like I am finally starting to recover from the Haven Conference! However, spending time with all of my blog friends last weekend makes the realization of going back to work tomorrow even harder than usual! Words cannot express how much I’m dreading it! Maybe one day, this little blog will be my job & I can spend all my days chatting with you all!! More time off would mean more DIY projects & more posts….wouldn’t that be FUN?!
Last week, I shared my Summer Mantel here on the blog & I had a few of you inquire about how to make the moss covered monogram I hung in the center of the display….

Luckily, I took pictures while I was making it, so I thought I would share a quick little tutorial with you today!! This was a super quick & easy project….I think I finished it in less than 10 minutes! I promise you, if you own a hot glue gun & have just an ounce of craftiness YOU CAN DO THIS!!!!

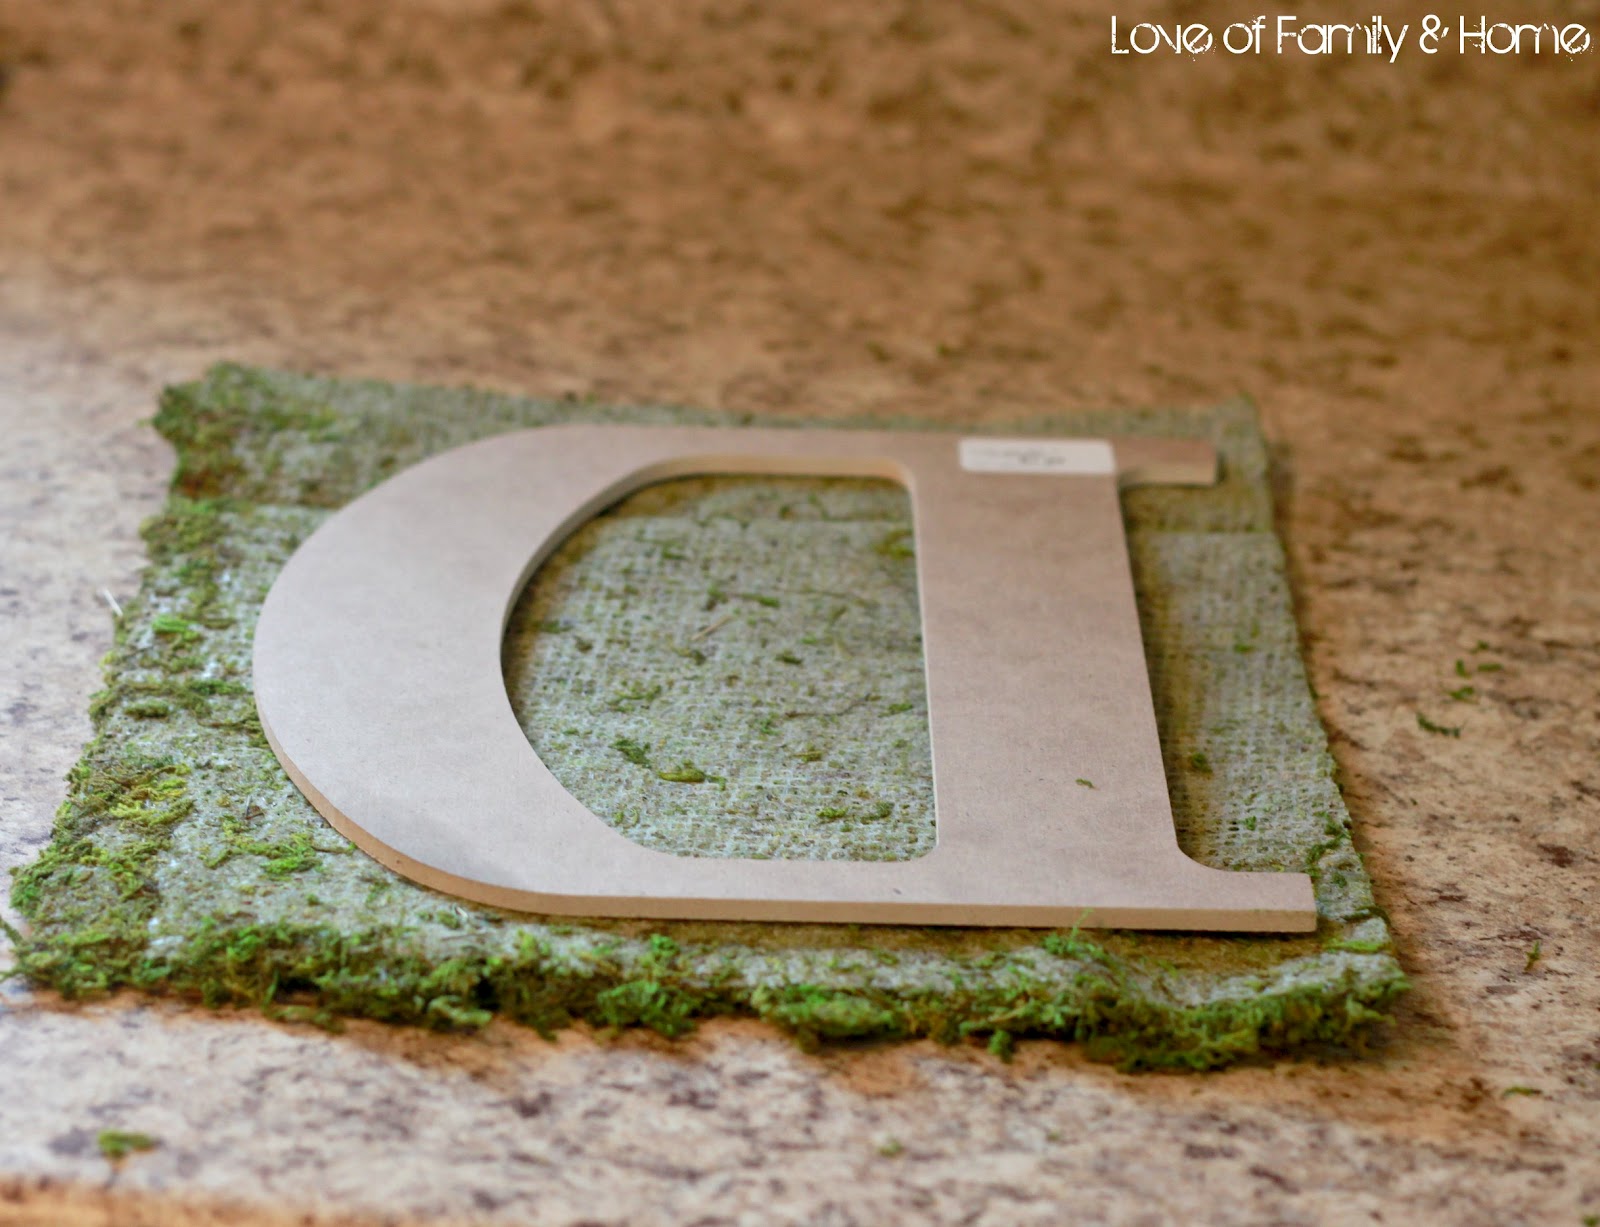
I purchased this 16″x18″ sheet of moss cloth at JoAnn Fabrics. It was originally $8.99, but I had a 50% coupon, so I paid around $4.50 (not including tax.)
I used a left-over wood letter that I had from our Father’s Day Project. It was purchased at Hobby Lobby for $1.00. I had spray painted it for the previous project, but that wouldn’t make a difference for the current one.

I started by laying the full sheet of moss out on my counter & placing the “D” in the lower left hand corner.

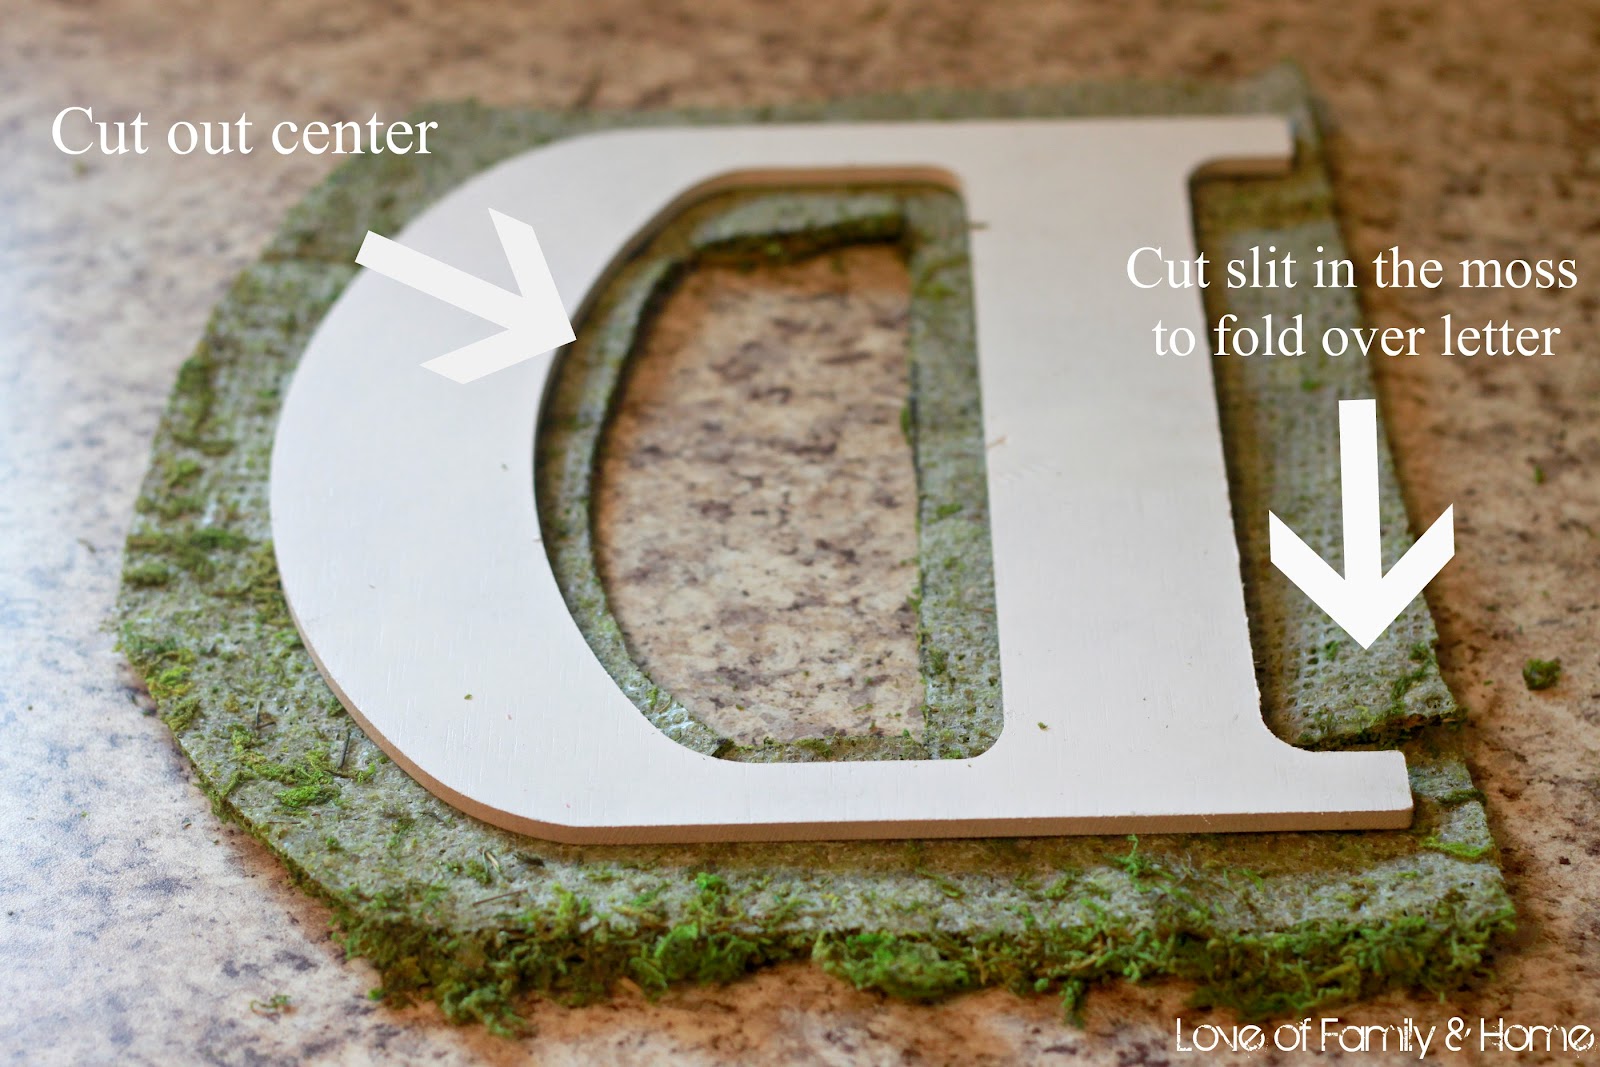
Then I trimmed off the excess moss using some scissors so that I could get rid of all the excess & have a smaller section to work with.
Next, I cut out the center section & also cut slits in the moss to fold over the backside of the monogram.
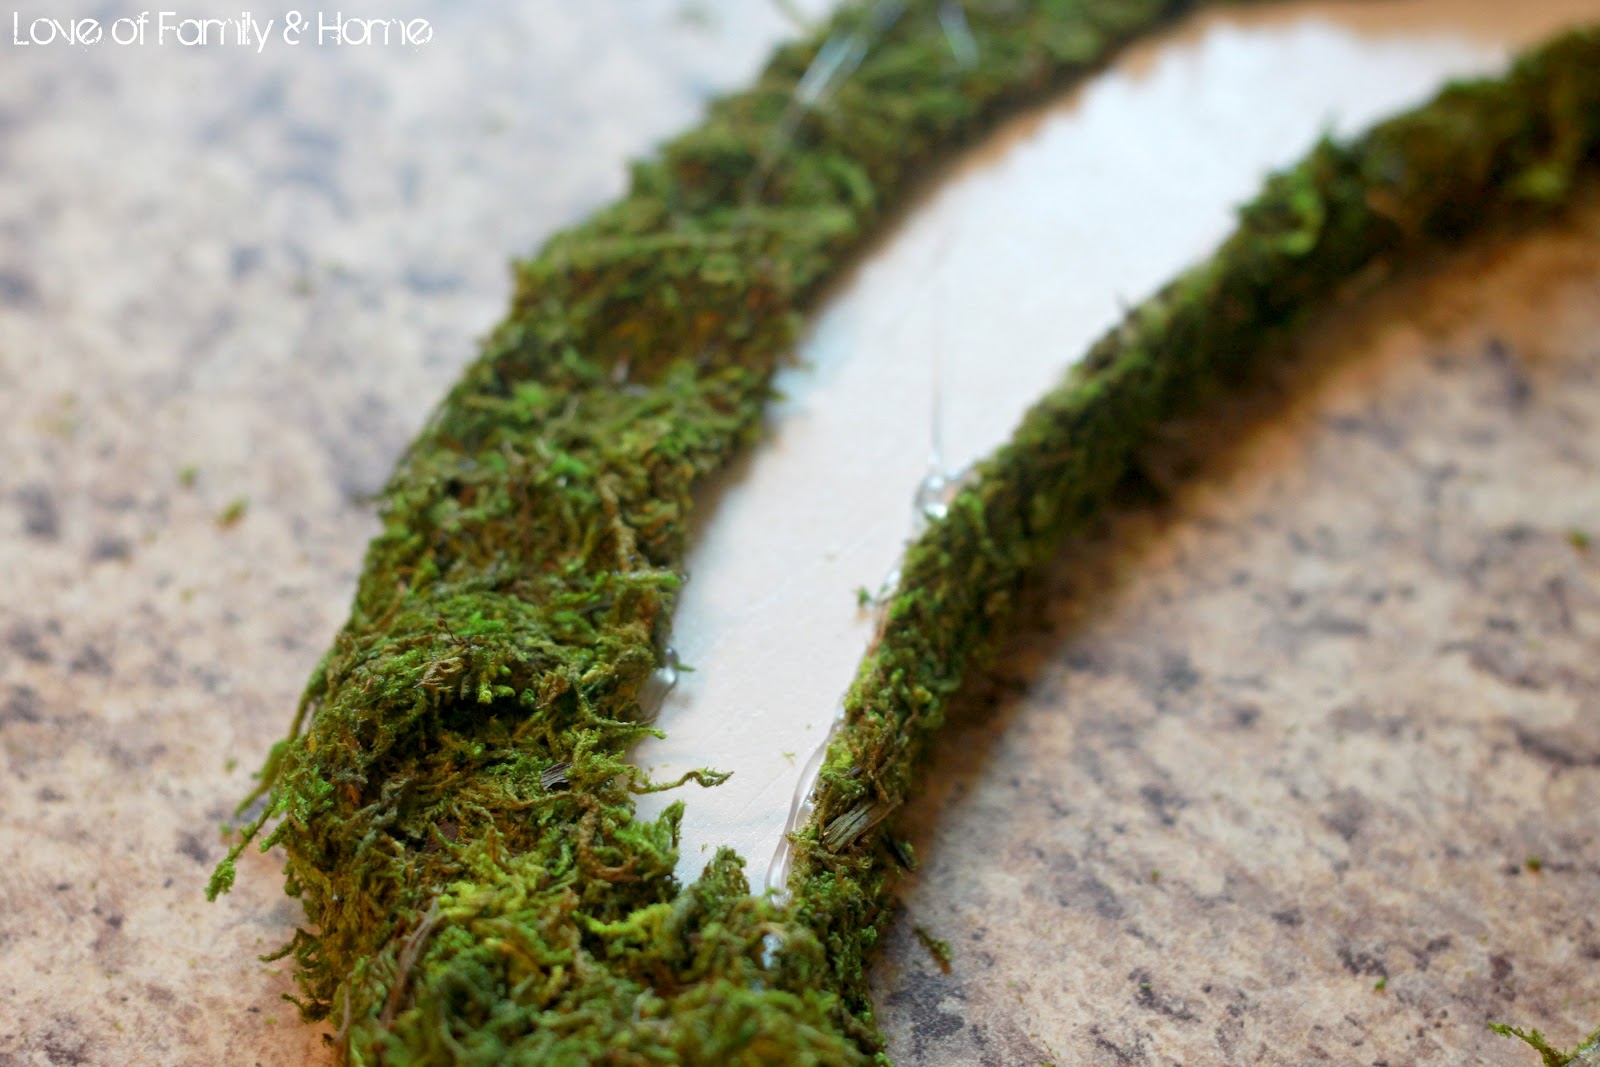
Then, I took my hot glue gun & ran a line of glue down the edge of the letter.

Quickly, I fold the moss over the back side of the letter before the glue dried & held it down firmly to make sure it adhered to the glue/letter.
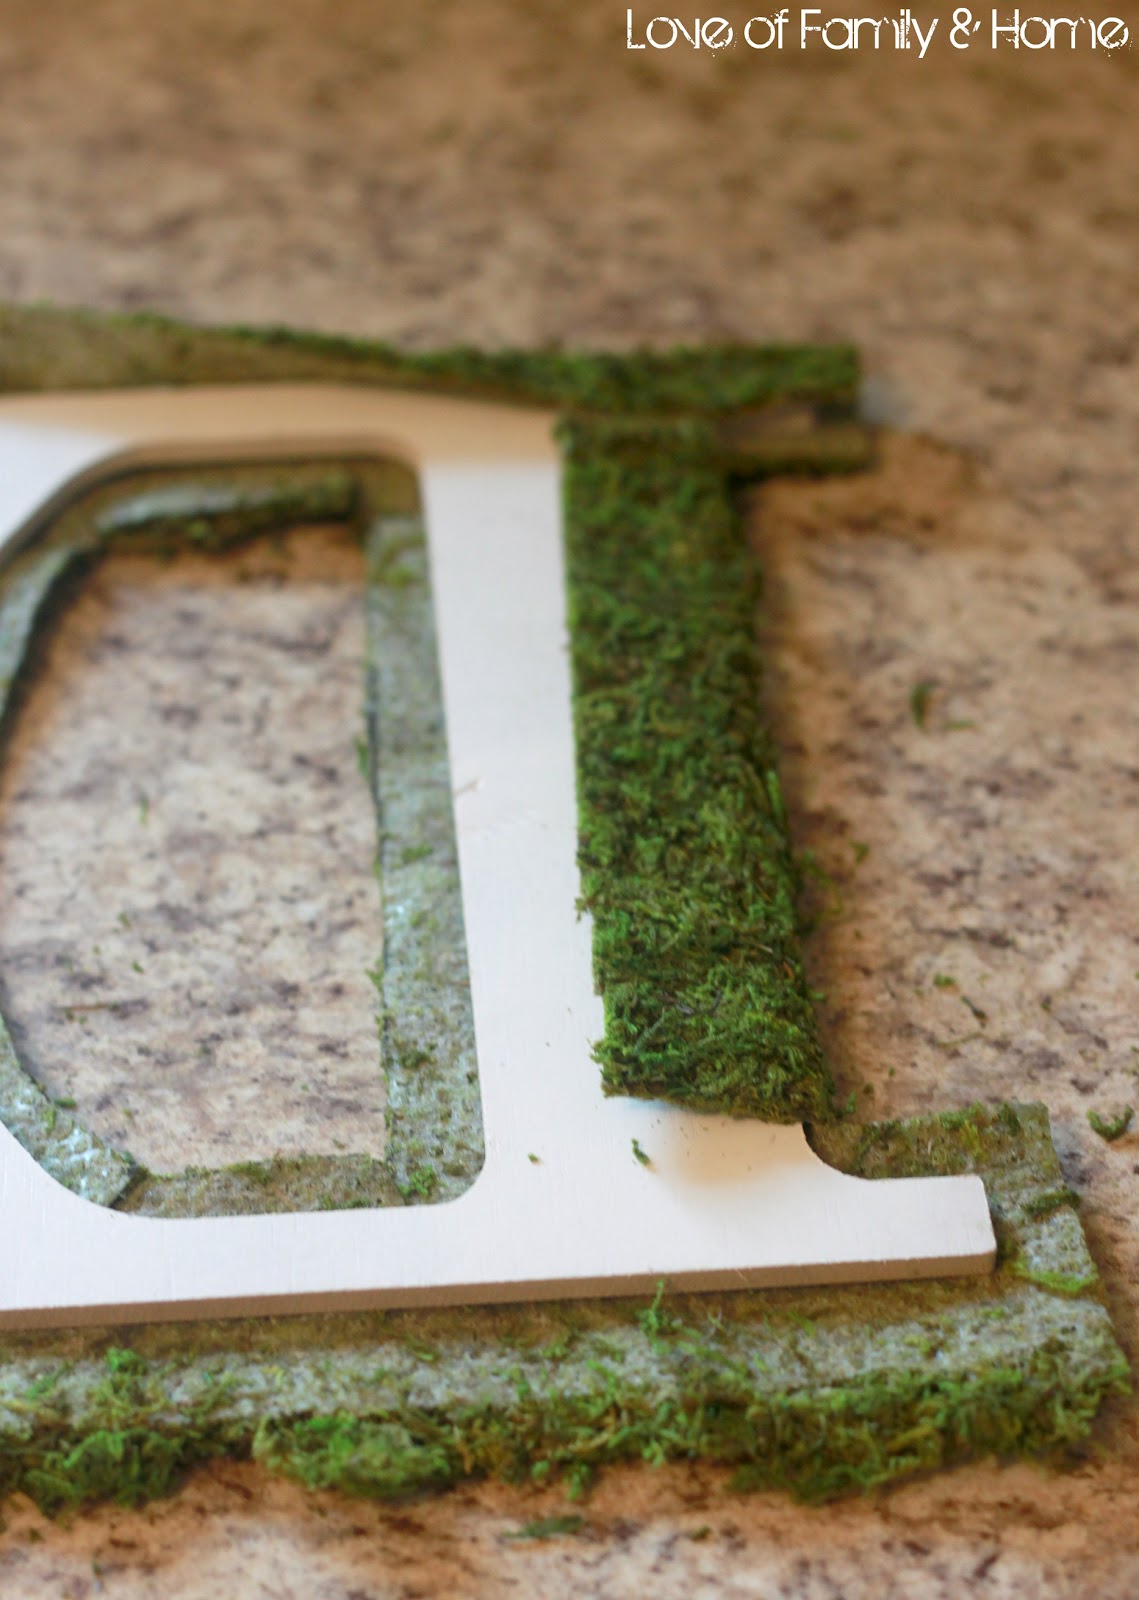
I repeated this process around the entire back side of the letter until all of the edges are covered.
Just an FYI: you may have to trim the moss here & there as you go. You want to make sure that it wraps tightly around the letter to prevent gaping on the front side.

When you are finished, it should look something like the one I have hanging….
I love how quick & easy this project was & I really love the pop of greenery it adds to the mantel. There are many things you can do with these moss covered letters & multiple ways you can display them! Just to give you a little inspiration & a few other ideas, I searched the web for a few more photos….
I love the moss monogram on this hutch via Dear Lillie….

I also LOVE the idea of spelling out your child’s name or hanging a monogram on an exterior door like these examples via Pottery Barn….


Did I mention that Pottery Barn sells these for $79.00 a piece?! Did I also mention that I made mine for under $6.00?! Wowza!!
They would also be beautiful for weddings….hanging on the front of the church doors! Or even hanging on the front door of your home!

And, last but not least….how stinkin’ COOL is this moss graffiti?! If I had a brick wall in my backyard or on a patio…I think I would definitely consider this!!

Brilliant!!
You can learn more about this project HERE.
See!!
The possibilities are endless!!
Have you made a mossy monogram?!
If so, how & where did you display yours?!
Thanks for stopping by!!
Have a beautiful Wednesday! 🙂


