Hey Everyone!!
I wanted to share with you a quick & easy way to update your Facebook cover photos!!
If your into photo editing at all, I’m sure that you have heard of the new site called PicMonkey. PicMonkey swept in & saved those of us who were Picnik addicts after their site sadly shut down in April. It is a FREE & very user friendly photo editing site & has many (if not all) of the same photo editing options that Picnik used to have. And now that PicMonkey has added the collage feature to their site over the weekend, I might even love their site just a little bit more than Picnik!!
They even have a collage option for Facebook cover photos!!! This is a great way to not only update your personal Facebook cover photo, but also to add some pizazz to your blog Facebook page!! I don’t know about you all, but my Facebook cover photo was looking just a little bit blah until earlier today!!
To create your custom Facebook cover photo just go to
www.picmonkey.com to get started!!
Once you arrive at their site, you will want to click on the “create a collage” option.

A listing of different collage features will show up in the left sidebar & you will then need to choose “FB Cover.”
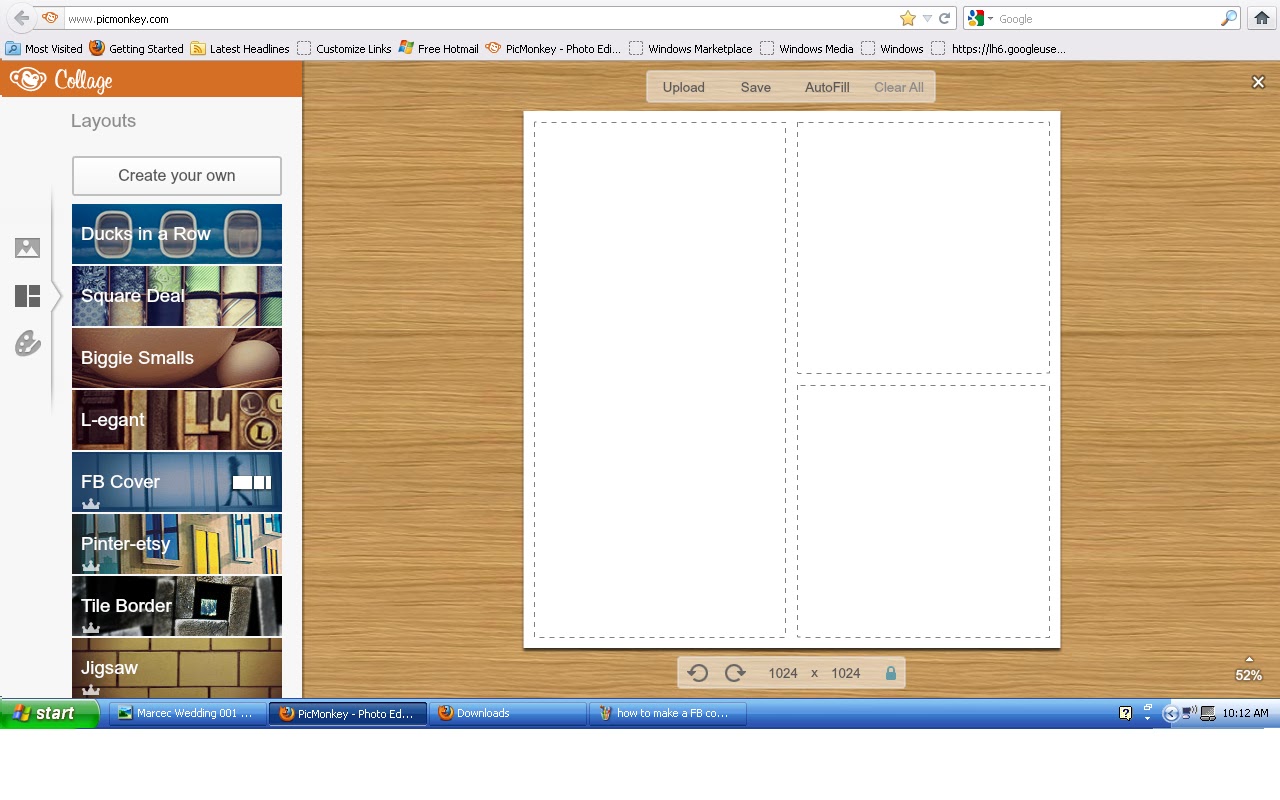
Once you click on it, you will see a few different layouts to choose from. Simply select the layout you would like to use & you are ready to start adding your photos!

To add photos to the collage, you will click on the photo icon (the one that looks like little mountains) & then select “upload photos.” This will allow you to choose photos from your hard drive to add to the collage.

As you start selecting the photos you would like to use, they will start filling up your library in the left sidebar.

After you have all the photos you would like to use, place the photos within the collage by simply dragging them from the left sidebar into the collage layout.

To change the spacing between the photos, click on the background icon (the one that looks like paints & a brush) & either increase or decrease spacing. You can also round the corners of the photos or change the color of the gridlines between the photos should you choose to do so.

When you are finished, just click on “Save” to save the image to your computer.
Then go to your Facebook page & upload your new cover photo!!

Voila!!
Isn’t that SO EASY?!
I love that PicMonkey included this collage option into their site!!


I even made a new Facebook cover photo for my personal page as well….

And here is a closer look at my blog Facebook cover photo….

What do you think?!
Now my Facebook cover photo not only reflects my blog, but it allows the new people coming to my page to get a little sneak peek into what my blog is all about!
Do you follow my blog on Facebook?!
Click HERE to “Like” the Love of Family & Home
Facebook Page and stay current with all the NEW & FUN things that are going on!!
It’s also a great way for me to be able to chat with all of you & answer any questions that you may have!!
Tutorials & Tips Linky Party at Home Stories A to Z


