Hey Y’all!!
Long time, no chat, huh?!
I can’t believe my last post was four months ago! The last time we were together, I shared our DIY Faux Fireplace Mantel for the store & then BOOM!! The insane Christmas shopping season began! It was all a crazy, wonderful whirlwind & I am still in awe of how amazing it all was. Honestly, I feel like I am just now recovering from it. Life is finally getting back to normal around here & I have to tell you….I missed this whole blogging thing….like a lot! 🙂
So Christmas came & went and January was upon us. I was itching to get a few projects completed around the house….you know, cuz the house kinda took a backseat to the store as well. First, and foremost, I had to do something about the boys’ shared bedroom. Remember when I blogged my inspiration for the room HERE?
Yeah, that was a long time ago.
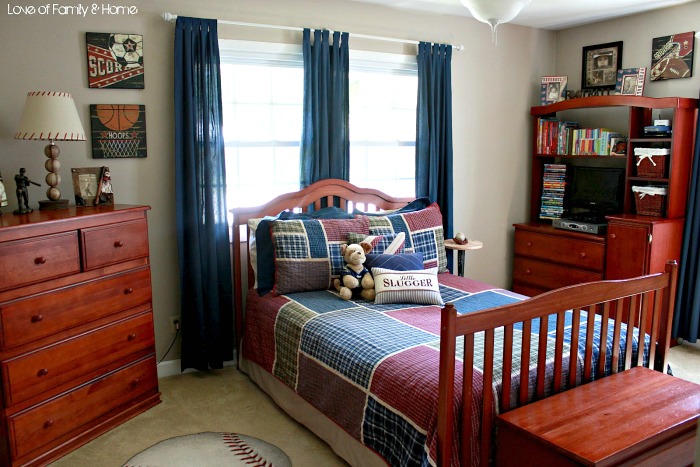
Before I start sharing pictures of the boys’ shared space now, let’s take a jog down memory lane & remember what this room looked liked when Parker was the only one occupying it.
As Griffin grew older, we found that he was spending most of his time in big brother’s room. Most nights he even wanted to sleep with Parker. With that being the case, we decided to move them into a shared bedroom. That meant that Griffin’s Route 66 Nursery would then become The Playroom and the boys would move into the above space together.
Once we had decided to make this move, we began brainstorming headboard ideas. Originally we thought we would just DIY some headboards, but then my mom text me one afternoon to tell me she found a twin size bed at Goodwill. The bed’s headboard & footboard were identical, which meant we could just use the footboard as a second headboard, and voila….two matching twin beds! Only problem was…they needed to be painted…easy enough! You can see the “new” headboards here. (Please excuse the crappy iPhone photos….)
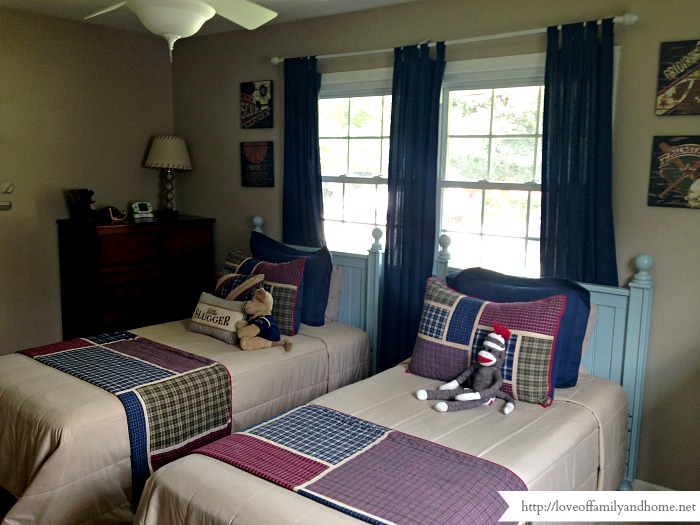
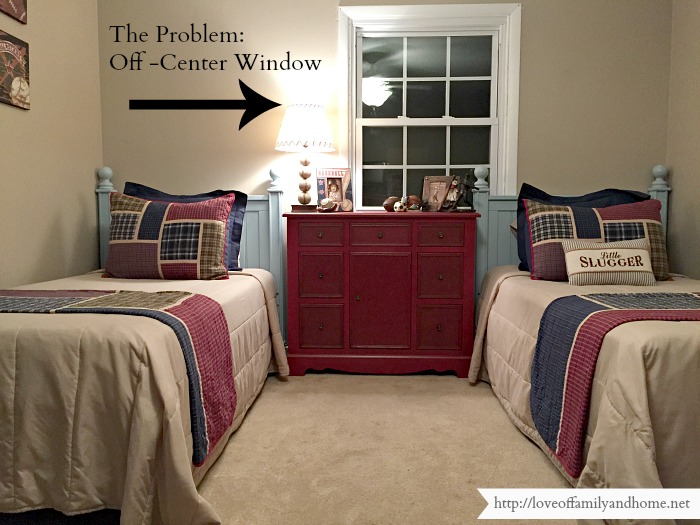
As you can see, I decided to put the beds on the same wall that Parker’s bed was on before. The problem with this was the utter lack of floor space. The beds just took up SO MUCH space and the room felt so cramped! In addition to the dresser you see in the far corner, there was also another dresser in the opposing corner.
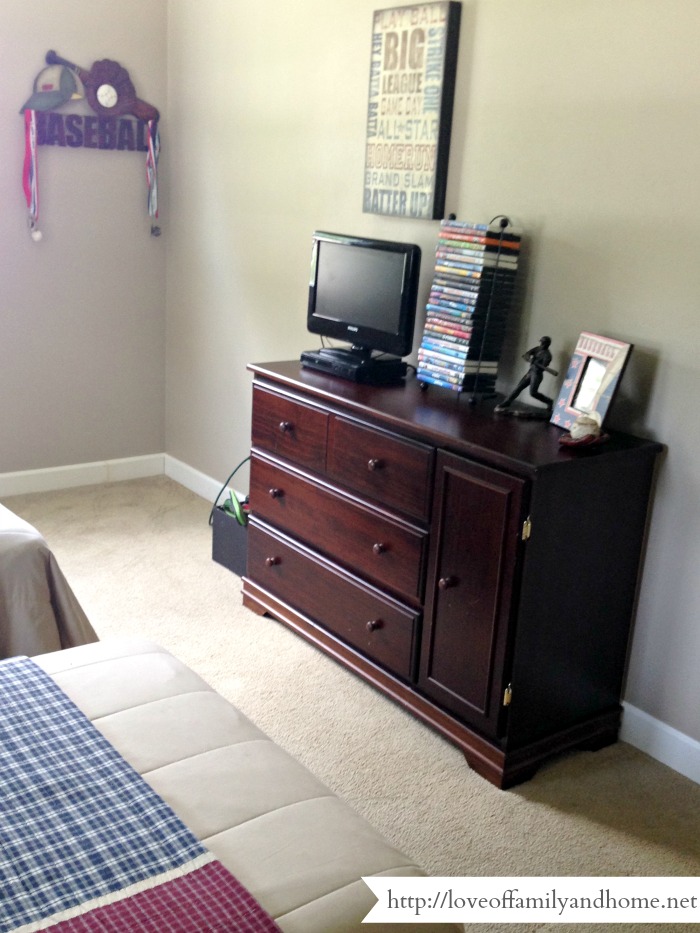
And a dresser at the ends of the beds which housed the boys’ television, DVD’s, etc.
Despite the cramped state of the room, we lived with it like this for about a year. I wasn’t happy with the room, but I was also kinda at a loss. I didn’t really think another layout was an option. I just thought that two beds were just too much for the room.
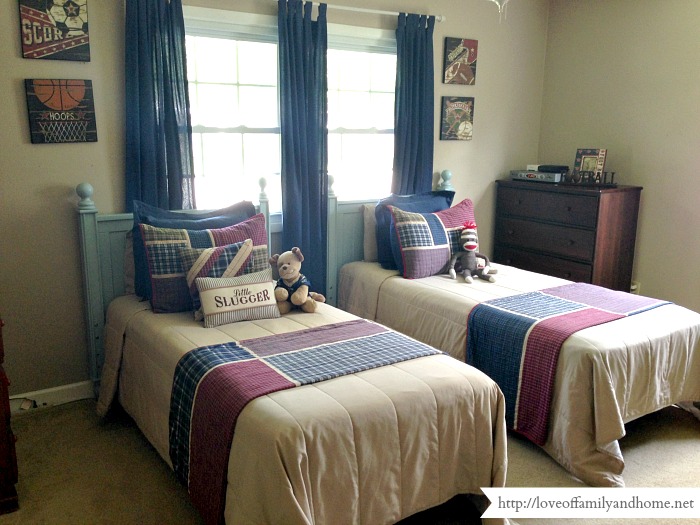
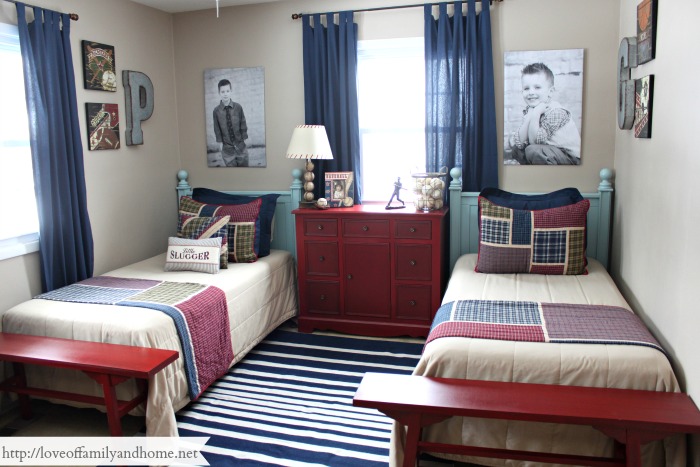
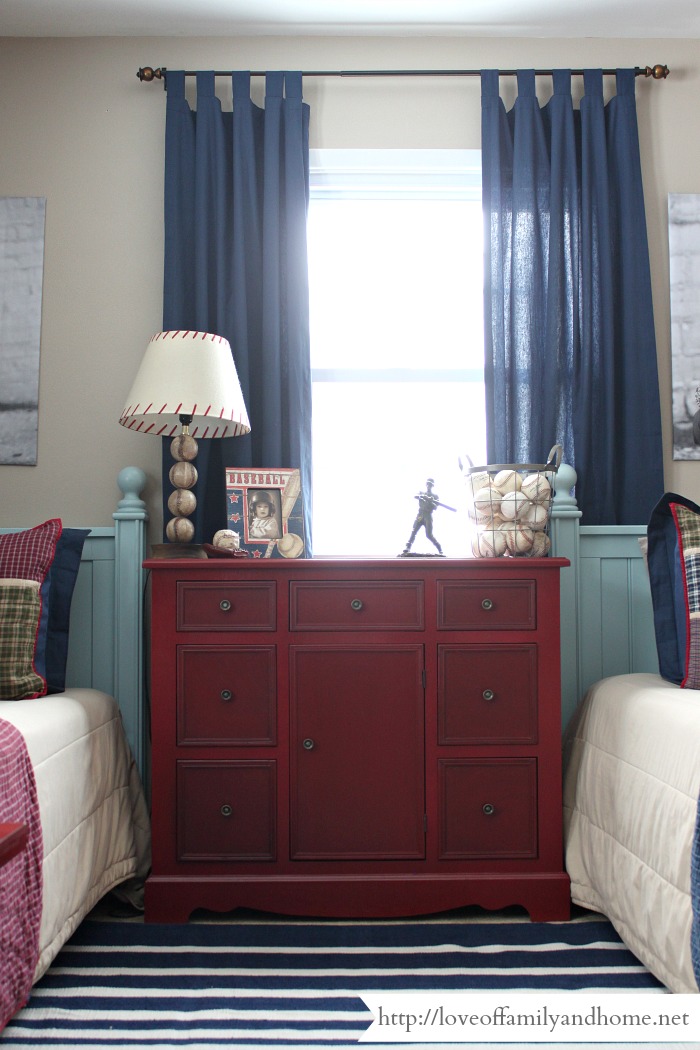
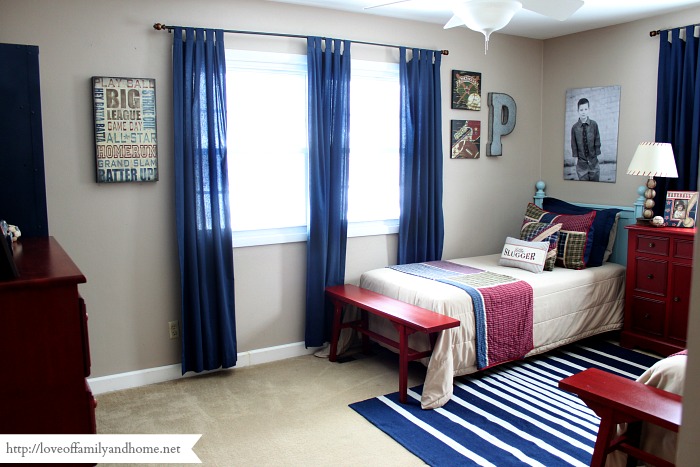
But in January, I finally had enough. I was desperate to make this room feel more spacious! I contemplated getting bunk beds…hoping that having the beds on top of one another would solve cramped feeling we had going on, but I decided to try one more thing first! I put the beds on the far right wall. You see, I had thought about doing this when we FIRST got the twin beds, but I just couldn’t handle the off-centered window you see in the photo below.
Really though, this set-up was ideal. And if you go back & look at my inspiration post for the boys’ room, so many of the rooms in that post have a window in between the two beds. It was really the look I was going for in the first place.
The first time I tried this set-up I didn’t have the red chest you see in the picture above. However, I thought putting the chest in between the two beds helped to make the arrangement feel a little more center. But the window….the window was still a problem. So, I went to social media…asking my friends & followers for advice. Most of them suggested the same idea I had already contemplated. Why not try to hang the curtain rod center, above the red chest, therefore, hanging the curtain off-center of the window. To try and “trick” the eye into believing that the window was center.
It sounded like it might work! And guess what?! It did!! 🙂
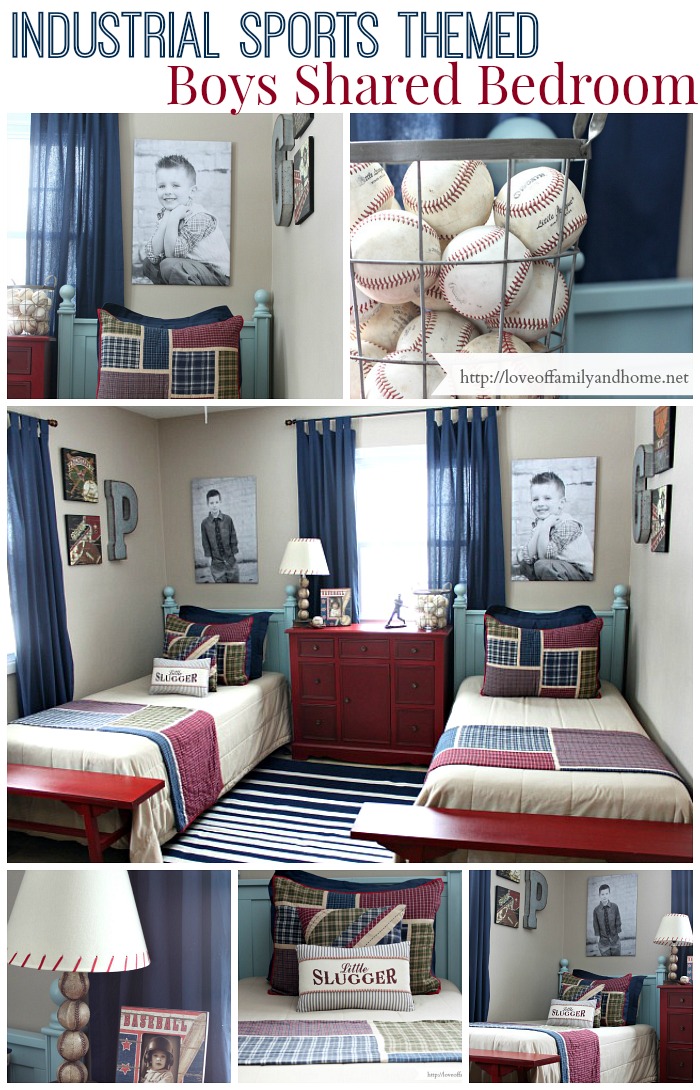
After hanging the curtains & adding a few new accessories to the room, I FINALLY have the bedroom I had envisioned for months!!! Although I still have a few things I am wanting to do in this space, I’m pretty excited to share our progress with you today! 🙂
You’ll notice that the headboards still haven’t been painted, but as of right now…they aren’t bothering me too bad. In fact, many of my Facebook and Instagram followers suggested leaving them the baby blue color that they are. They liked the contrast. I haven’t decided if I am gonna leave them or paint them at this point, but I will tell you they aren’t bothering me like they were before. What do you think?
As far as bedding for the room, I really liked the plaid bedding I had for Parker’s room. It already matched all of the decor I had purchased thus far for the space & because I had already had the two plaid shams (one for each twin bed), I decided I would just go with it. So, I purchased two plain, khaki colored comforters from Walmart and then took the plaid comforter I had from Parker’s room & cut it in half to make two coverlets to go on the ends of each bed.
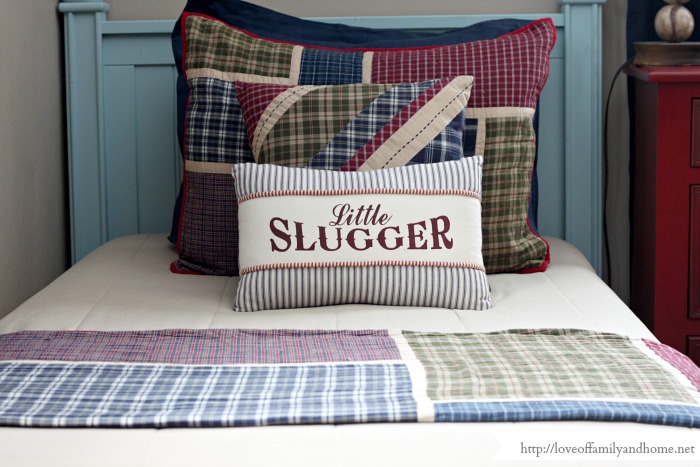
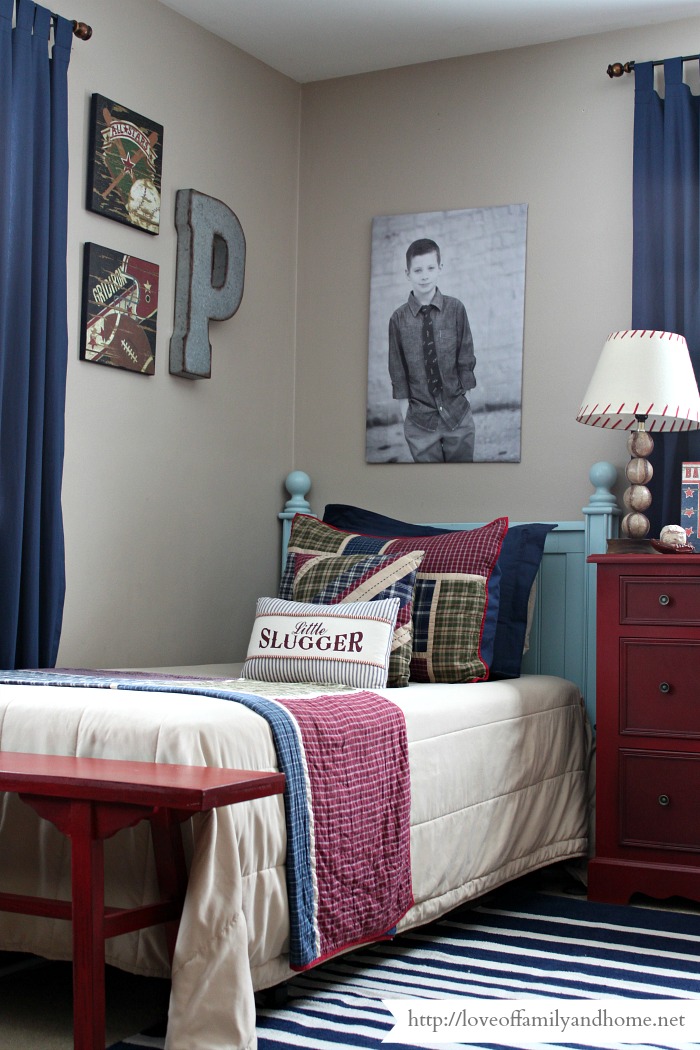
As far as matching throw pillows for each bed, I am lacking. Currently, Parker’s bed is the only one with any throw pillows, but mom & I have something up our sleeves to coordinate the two beds. For now, the “Little Slugger” throw pillow occupies Parker’s bed. It is compliments of my mom’s mad sewing skills. One of these days I am gonna learn how to work that sewing machine by myself!
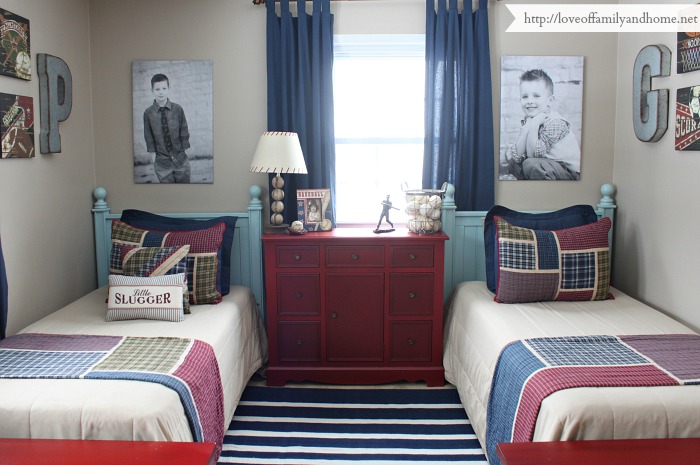
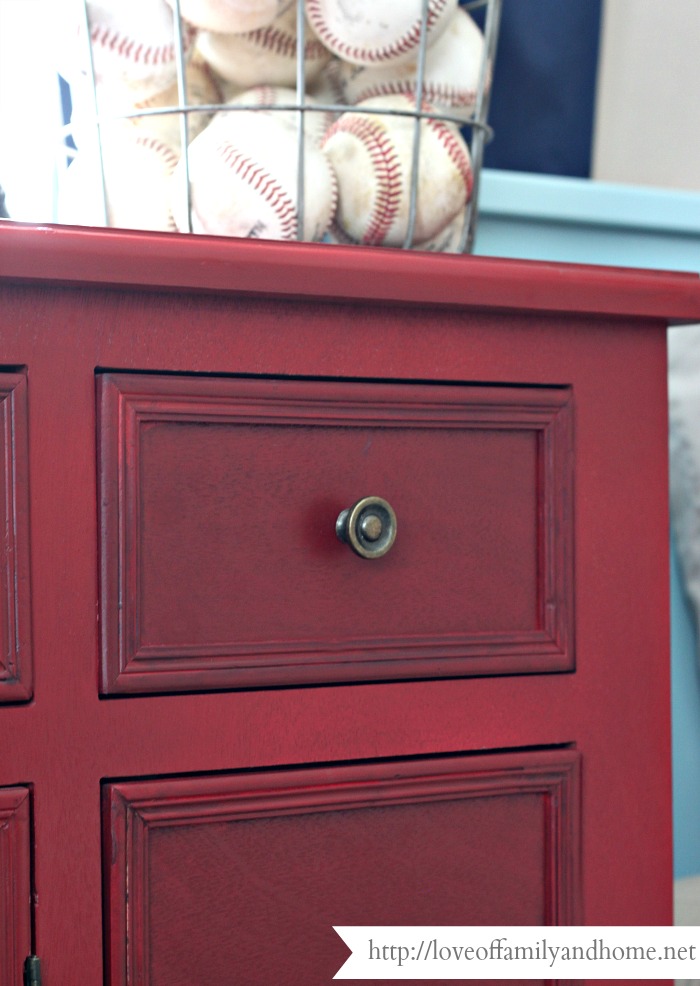
Like I said before, I feel like the red chest in between the two beds did wonders for this space. Not only did it help make the arrangement feel more centered, but I had been wanting a small dresser to place in between the beds for sometime. We ended up getting rid of one of our chest of drawers & utilized this red chest for the extra storage we needed. I purchased this chest at Kirklands and if you recall, I have a similar one in the boys’ playroom in blue. I really like these chests because not only are they cute, but they add a pop of color to the room, they have great storage, & they don’t take up a lot of space. They are only 12″ deep!
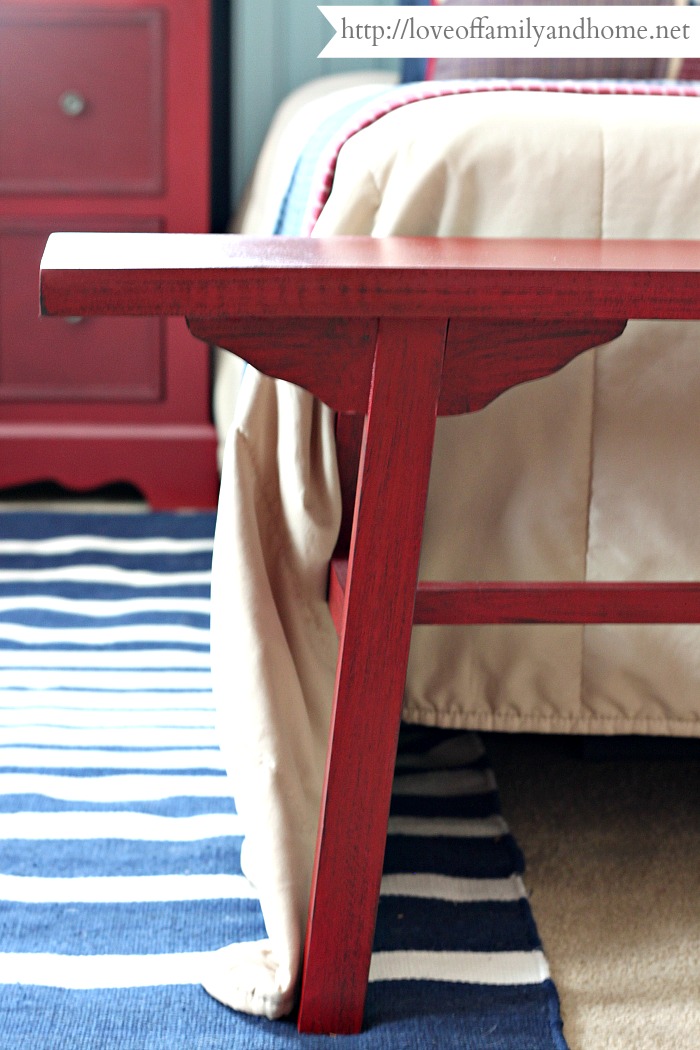
The day after I moved the beds to this wall, I went out shopping for a rug & something to put at the ends of each bed…a bench, storage chest, etc. We are somewhat limited in our area for shopping, so if I came home with one of those items I was going to declare my shopping day a success. Little did I know that I would come home with a rug & matching benches just a couple hours later!
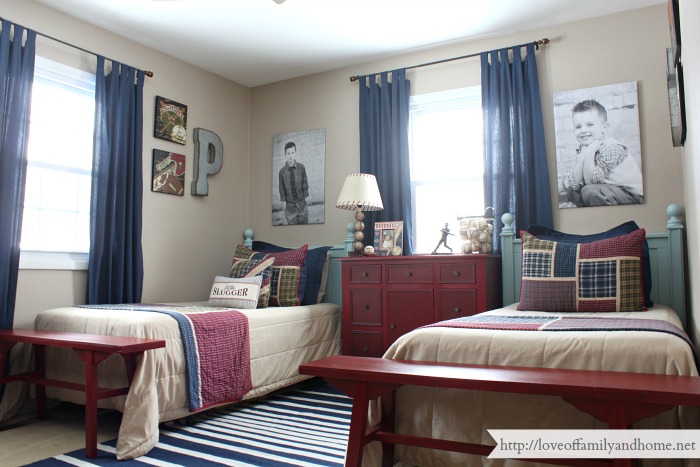
And somehow….the benches match the little red chest perfectly?!
Seriously, the BEST.SHOPPING.DAY.EVER!!!!
Much of the wall decor you see in the room was left-over from Parker’s bedroom, although I did bring in a few new pieces.

I’d had my eye on these large galvanized metal letters from Hobby Lobby for quite some time, so I waited for them to go 50% off & made at trip to the store to snag them. I love how they look on each side of the room & the industrial feel they bring to the space.
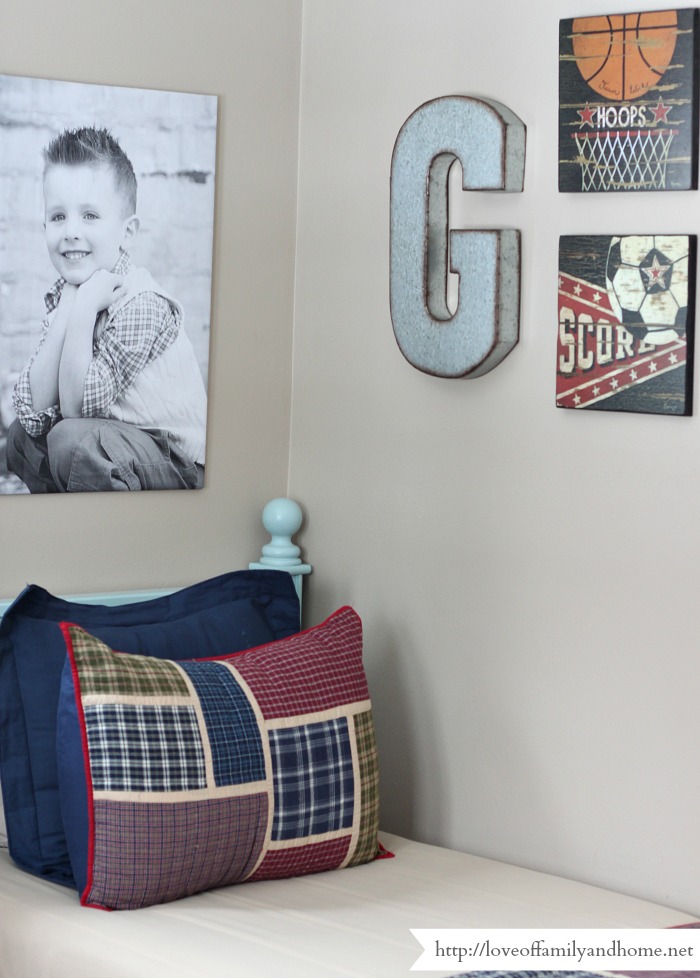
Many of you on Facebook and Instagram inquired about the large prints above the boys’ beds. Even though they look like canvases from afar, they are basically just oversized posters I had printed at Staples. I will do another post in the coming days to show you how I made them & hung them on the wall, but I will tell you now, they were super easy to make & extremely cheap!

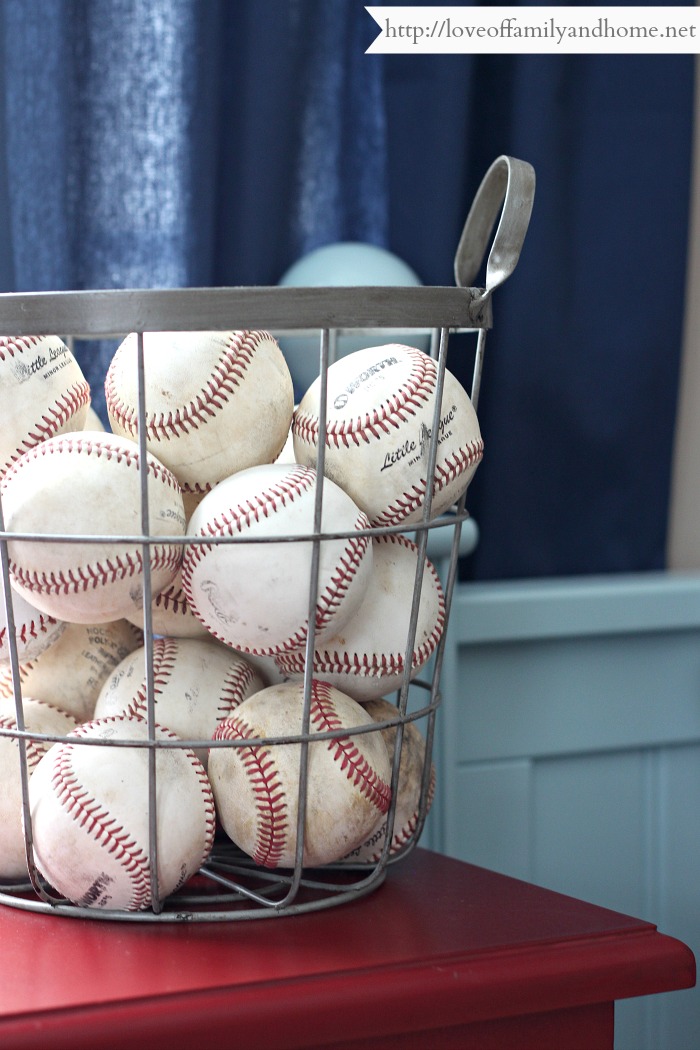
This little wire basket was another Hobby Lobby find that I got 50% off. I snagged all of the old baseballs we had lying around in the garage & filled it up to make a cute, decorative piece for the room. The metal in the basket ties in nicely with the galvanized metal letters on the wall, and again, add to the industrial feel I was going for.
I had mentioned earlier in the post the red benches that I bought for the ends of the boys’ beds. These again, were another Hobby Lobby find! 🙂
I took this shot just so you could see the difference in floor space between the two layouts. As you can see, the boys have so much more room! I love that I can walk into this space now without feeling cramped!
One thing that is lacking in this room is a closet. The boys desperately needed a place where they could hang up their coats, backpacks, and a place where they could store their shoes, hats, etc. I came across these lockers in a Facebook swap group & quickly snatched them up!
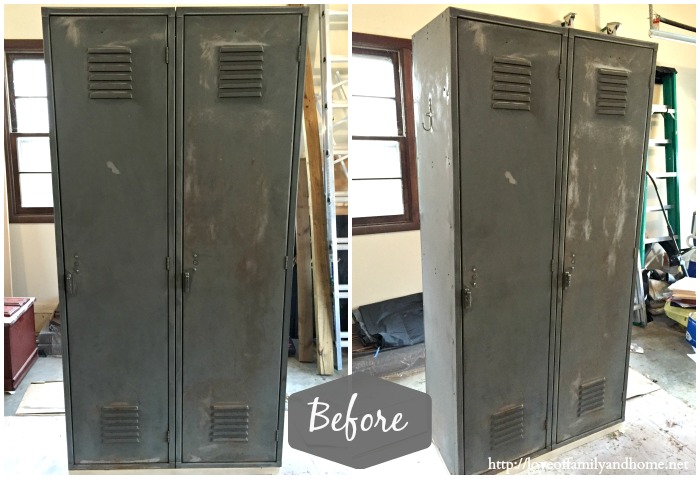
I thought the lockers would tie in nicely with the sports theme we had going on in the space & would also solve our coats & backpacks dilemma. These lockers are quite a bit larger than your average school locker. The two side by side measure 36″ wide & 72″ tall. They actually came with a third locker, but we didn’t have room in the space for the third one. My dad was nice enough to take on of the lockers off & sand them down for me. Then I spray painted them using Valspar Indigo Streamer Satin spray paint.
Here’s what they look like now….
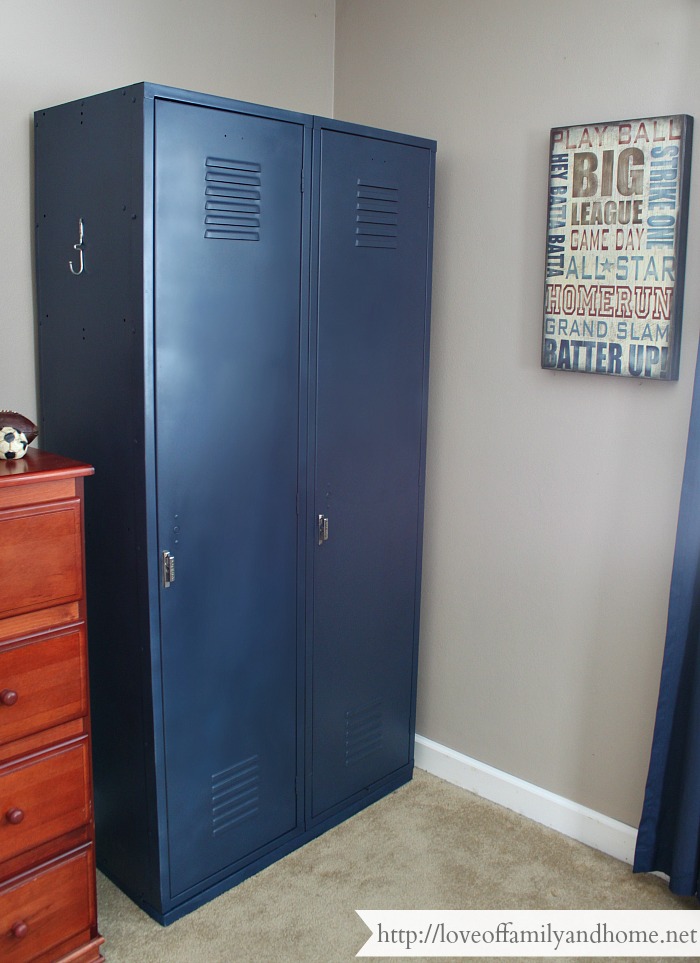
Not too shabby, eh?!
I kinda love how they turned out! I would really like to get some numbers or even engraved name plates to put on each one, but for now…they are perfect! 🙂
So, that’s where I am on the boys’ shared bedroom. What do you think of my progress?!
Slowly, but surely….we’re getting there! 🙂
As always, thanks so much for visiting me today!
I do have a few other room updates that I’m hoping to share with you all very soon, so please come back & visit! Until then, I hope you have a great day!!
Linking up here…
Tutorial & Tips Tuesday at Home Stories A to Z
Wow Us Wednesday at Saavy Southern Style
DIY Projects & Party Time at The 36th Avenue
Link Party Palooza at Tatertots & Jello
Inspiration Gallery at Design, Dining, & Diapers
Frugal Friday at The Shabby Nest
Sunday Showcase Party at By Stephanie Lynn


